Download presentation
Presentation is loading. Please wait.

1
[LAB 3]Make OS SD Card Step1 Download the image file.
Step2 Prepare the tools required. Step3 Prepare the Micro SD card(TF Card) Step4 Write image file to memory card
![[LAB 3]Make OS SD Card Step1 Download the image file.](http://slidesplayer.com/slide/15081265/91/images/1/%5BLAB+3%5DMake+OS+SD+Card+Step1+Download+the+image+file..jpg "Step2 Prepare the tools required. Step3 Prepare the Micro SD card(TF Card) Step4 Write image file to memory card.")
2
Step1 下載映像檔 下載適用於BeagleBone硬體版本的image檔案。(50min) 參考網址為:
 參考網址為: title=BeagleBone.")
3
Step1 下載映像檔

4
Step1 下載映像檔 範例版本為A6A版的 image file package BeagleBone_Rev_A6A_Production_11_22_2012.7z. 將下載完的Package 解壓縮後備用

5
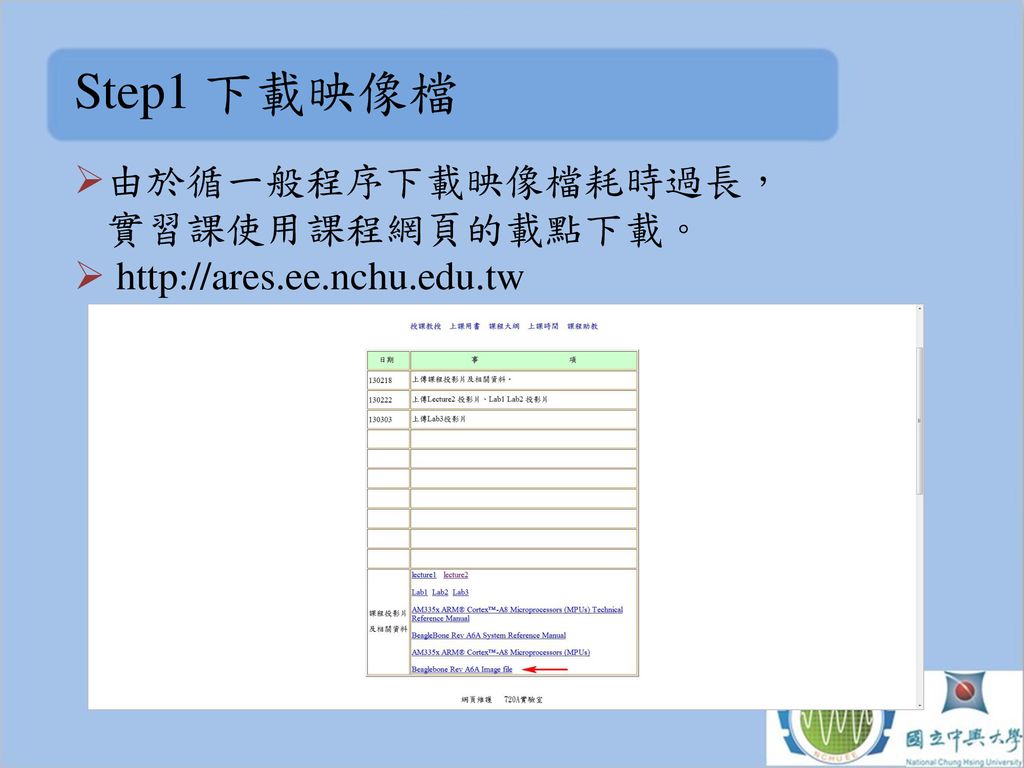
Step1 下載映像檔 由於循一般程序下載映像檔耗時過長, 實習課使用課程網頁的載點下載。
6
Step1 下載映像檔 課程網頁的檔案為已解壓縮的img檔,能夠 省去解壓縮的步驟。

7
Step2 準備相關工具 準備所需工具: 解壓縮工具以及Image writer 工具。
解壓縮: (0min) 可解.7z檔案的軟體(ex:7zip or Winrar) Image writer: (<1min) 將image file在配置到記憶卡中(Ex: Win32 DiskImager)
 可解.7z檔案的軟體(ex:7zip or Winrar) Image writer: (<1min) 將image file在配置到記憶卡中(Ex: Win32 DiskImager)")
8
Step2 準備相關工具

9
Step2 準備相關工具

10
Step3 準備記憶卡 準備一張micro SD Card,4G Class4(基本) or 8G 以上(建議),以FAT or FAT32格式化完成後,插入電腦備用。(0 min)
 or 8G 以上(建議),以FAT or FAT32格式化完成後,插入電腦備用。(0 min)")
11
Step4 進行燒錄 以系統管理者權限打開WinDiskImager,選擇欲燒錄的image檔案與記憶卡所在磁碟機代號。

12
Step4 進行燒錄 選擇寫入後,等待燒錄完成。(10min)
")
13
Step4 進行燒錄 燒錄完成。

Similar presentations

 装配 后调整检测.>")


