Download presentation
Presentation is loading. Please wait.

1
履歷撰寫要點 王藝玲 寶來證券股份有限公司 2011年03月03日

2
講師介紹 姓名:王藝玲 現職:寶來證券股份有限公司 人力資源處 經理 經歷:香港上海匯豐銀行 人力資源處副理、 公共事務處副理
現職:寶來證券股份有限公司 人力資源處 經理 經歷:香港上海匯豐銀行 人力資源處副理、 公共事務處副理 學歷:中央大學企管所碩士、中山大學外文系學士 備註: 青輔會「產業與職涯校園講座」講師 元智大學經管碩士班課程諮詢委員暨職涯導師 台北商業技術學院研發處就輔組研習營講師 台灣科技大學企管系「銷售人員教育與發展」講座 2010 東南、景文科技大學學生諮商中心研習營講師 2010 教育部第一屆技職教育貢獻獎專案經辦 2010 北區技專院校暨清雲科大就業力座談會委員與主講人 2010 勞委會職訓局就業促進方案講師 2010 中華人力資源管理協會產投訓練班講師 2009 高級證券業務員證照 2008 ISO10015 認證、2008 文化大學財金系校務評鑑委員

3
公司簡介─寶來證券 實收資本額:新台幣213億 員工人數:2,000人 營業據點:48家分公司
為台灣金融創新的領導品牌,以1988年成立並向外拓展,1996年正式掛牌,為台灣最大的獨立券商,是台灣第一家上市的證券公司,且外資持股比率45%以上,於台灣指數型基金(ETF)/結構性商品/期貨市場均位居領導地位 。 寶來投信與寶來曼氏期貨的控股公司。 寶來投信拿下九成ETF之市佔率,龍頭地位穩固,2009年搶下申募國內首檔以陸股為投資標的ETF「寶來標智滬深300基金」的頭香,並成功將台灣50ETF推展至香港證交所掛牌。 2009年國內期權、ETF市占率、台灣存託憑證(TDR)件數冠軍。 分別在香港、上海、北京、廣州、越南等地設點。
/結構性商品/期貨市場均位居領導地位 。 寶來投信與寶來曼氏期貨的控股公司。 寶來投信拿下九成ETF之市佔率,龍頭地位穩固,2009年搶下申募國內首檔以陸股為投資標的ETF「寶來標智滬深300基金」的頭香,並成功將台灣50ETF推展至香港證交所掛牌。 2009年國內期權、ETF市占率、台灣存託憑證(TDR)件數冠軍。 分別在香港、上海、北京、廣州、越南等地設點。")
4
25/02/2017 Please mute Your cell! 4 4 4

5
履歷種類與格式:電子履歷、一般履歷與自備中英文履歷
前言:履歷表之定位 履歷種類與格式:電子履歷、一般履歷與自備中英文履歷 中文自傳 Animated picture buttons grow and turn on path (Advanced) To reproduce the curved shape on this slide, do the following: On the Home tab, in the Slides group, click Layout, and then click Blank. On the Home tab, in the Drawing group, click Shapes, and then under Basic Shapes click Right Triangle (first row, fourth option from the left). On the slide, draw a triangle. Under Drawing Tools, on the Format tab, in the Size group, enter 7.5” into the Height box and enter 4.75” into the Width box. On the Home tab, in the Drawing group, click Arrange, point to Align, and then do the following: Click Align Middle. Click Align Left. On the slide, select the triangle. Under Drawing Tools, on the Format tab, in the Insert Shapes group, click Edit Shape, and then click Edit Points. Right-click the diagonal side of the triangle, and then click Curved Segment. Click the bottom right corner of the triangle and then move the curve adjustment handle to create a consistent curve. Also on the Format tab, in the Shape Styles group, click Shape Fill, and then under Theme Colors click White, Background 1 (first row, first option from the left). Also on the Format tab, in the Shape Styles group, click Shape Outline, and then click No Outline. To reproduce the background effects on this slide, do the following: On the Design tab, in the Background group, click Background Styles, and then click Format Background. In the Format Background dialog box, click Fill in the left pane, select Gradient fill in the Fill pane, and then do the following: In the Type list, select Linear. In the Angle box, enter 225. Under Gradient stops, click Add gradient stops or Remove gradient stops until two stops appear in the slider. Also under Gradient stops, customize the gradient stops as follows: Select the first stop in the slider, and then do the following: In the Position box, enter 0%. Click the button next to Color, and then under Theme Colors click White, Background 1 (first row, first option from the left). In the Transparency box, enter 0%. In the Position box, enter 100%. Click the button next to Color, click More Colors, and then in the Colors dialog box, on the Custom tab, enter values for Red: 230, Green: 230, Blue: 230. To reproduce the picture and text effects on this slide, do the following: On the Insert tab, in the Images group, click Picture. In the Insert Picture dialog box, select a picture, and then click Insert. On the slide, select the picture. Under Picture Tools, on the Format tab, in the Size group, click the arrow under Crop, click Crop to Shape, and then under Basic Shapes click Oval (first option from the left). With the picture still selected, under Picture Tools, on the Format tab, in the Size group, click the Size and Position dialog box launcher. In the Format Picture dialog box, resize or crop the image so that the height is set to 1.2” and the width is set to 1.2”. To crop the picture, click Crop in the left pane, and in the right pane, under Crop position, enter values into the Height, Width, Left, and Top boxes. To resize the picture, click Size in the left pane, and in the right pane, under Size and rotate, enter values into the Height and Width boxes. Also in the Format Picture dialog box, click 3-D Format in the left pane, and then, in the 3-D Format pane, do the following: Under Bevel, click the button next to Top and click Circle (first row, first option from the left). Under Surface, click the button next to Material, and then under Standard click Metal (fourth option from the left). Click the button next to Lighting, and then under Neutral click Contrasting (second row, second option from the left). In the Angle box, enter 25°. Also in the Format Picture dialog box, click Shadow in the left pane. In the Shadow pane, click the button next to Presets, under Outer click Offset Diagonal Bottom Left (first row, third option from the left), and then do the following: In the Transparency box, enter 77%. In the Size box, enter 100%. In the Blur box, enter 10 pt. In the Angle box, enter 141°. In the Distance box, enter 10 pt. On the slide, drag the picture onto the curve, near the top. On the Insert tab, in the Text group, click Text Box. On the slide, drag to draw the text box. Enter text in the text box and select it. On the Home tab, in the Font group, do the following: In the Font list, select Corbel. In the Font Size box, enter 22. Click the arrow next to Font Color, and then under Theme Colors click White, Background 1, Darker 50% (sixth row, first option from the left). On the Home tab, in the Paragraph group, click Align Text Left to align the text left in the text box. On the slide, drag the text box to the right of the picture. To reproduce the animation effects on this slide, do the following: It will help to zoom out in order to view the area off the slide. On the View tab, in the Zoom group, click Zoom. In the Zoom dialog box, select 65%. On the Animations tab, in the Advanced Animation group, click Add Animation, and then click More Entrance Effects. In the Add Entrance Effect dialog box, under Moderate, click Grow & Turn, and then click OK. On the Animations tab, in the Timing group, in the Start list, select With Previous. On the Animations tab, in the Timing group, in the Duration box, enter 1. On the Animations tab, in the Advanced Animation group, click Add Animation, and then under Motion Paths click Arcs. On the Animations tab, in the Animation group, click Effect Options, and then click Right. On the Animations tab, in the Animation group, click Effect Options, and then click Reverse Path Direction. On the slide, select the arc effect path, and then drag the bottom sizing handle below the bottom of the slide. Drag the right side sizing handle to the left until the path curve approximately matches the curve of the modified triangle. Drag the green rotation handle to the left to rotate the arc path to match the curve of the modified triangle. Drag the arc path so that the red arrow is in the center of the picture. You may need to make further adjustments to the length, width, and angle of the arc path to match the curve of the modified triangle. On the slide, select the text box. On the Animations tab, in the Advanced Animation group, click Add Animation, and then under Entrance click Fade. On the Animations tab, in the Timing group, in the Start list, select After Previous. To reproduce the other animated pictures and text boxes on this slide, do the following: On the Animations tab, in the Advanced Animation group, click Animation Pane. On the slide, press and hold CTRL and then select the picture and the text box. On the Home tab, in the Clipboard group, click the arrow next to Copy, and then click Duplicate. On the slide, drag the duplicate picture and text onto the curve below the first group. On the slide, select the duplicate picture. Under Picture Tools, on the Format tab, in the Adjust group, click Change Picture. In the Insert Picture dialog box, select a picture, and then click Insert. Under Picture Tools, on the Format tab, in the Size group, click the Size and Position dialog box launcher. In the Format Picture dialog box, resize or crop the image so that the height is set to 1.2” and the width is set to 1.2”. To crop the picture, click Crop in the left pane, and in the right pane, under Crop position, enter values into the Height, Width, Left, and Top boxes. To resize the picture, click Size in the left pane, and in the right pane, under Size and rotate, enter values into the Height and Width boxes. In the Animation Pane, click the Arc animation effect for the new picture. Drag the green rotation handle to the right to rotate the arc path to match the curve of the modified triangle. Drag the arc path so that the red arrow is in the center of the picture. Click in the duplicate text box and edit the text. Repeat steps 2-7 two more times to reproduce the third and fourth pictures and text boxes with animation effects. 檢查角度與求職信
 To reproduce the curved shape on this slide, do the following: On the Home tab, in the Slides group, click Layout, and then click Blank. On the Home tab, in the Drawing group, click Shapes, and then under Basic Shapes click Right Triangle (first row, fourth option from the left). On the slide, draw a triangle. Under Drawing Tools, on the Format tab, in the Size group, enter 7.5 into the Height box and enter 4.75 into the Width box. On the Home tab, in the Drawing group, click Arrange, point to Align, and then do the following: Click Align Middle. Click Align Left. On the slide, select the triangle. Under Drawing Tools, on the Format tab, in the Insert Shapes group, click Edit Shape, and then click Edit Points. Right-click the diagonal side of the triangle, and then click Curved Segment. Click the bottom right corner of the triangle and then move the curve adjustment handle to create a consistent curve. Also on the Format tab, in the Shape Styles group, click Shape Fill, and then under Theme Colors click White, Background 1 (first row, first option from the left). Also on the Format tab, in the Shape Styles group, click Shape Outline, and then click No Outline. To reproduce the background effects on this slide, do the following: On the Design tab, in the Background group, click Background Styles, and then click Format Background. In the Format Background dialog box, click Fill in the left pane, select Gradient fill in the Fill pane, and then do the following: In the Type list, select Linear. In the Angle box, enter 225. Under Gradient stops, click Add gradient stops or Remove gradient stops until two stops appear in the slider. Also under Gradient stops, customize the gradient stops as follows: Select the first stop in the slider, and then do the following: In the Position box, enter 0%. Click the button next to Color, and then under Theme Colors click White, Background 1 (first row, first option from the left). In the Transparency box, enter 0%. In the Position box, enter 100%. Click the button next to Color, click More Colors, and then in the Colors dialog box, on the Custom tab, enter values for Red: 230, Green: 230, Blue: 230. To reproduce the picture and text effects on this slide, do the following: On the Insert tab, in the Images group, click Picture. In the Insert Picture dialog box, select a picture, and then click Insert. On the slide, select the picture. Under Picture Tools, on the Format tab, in the Size group, click the arrow under Crop, click Crop to Shape, and then under Basic Shapes click Oval (first option from the left). With the picture still selected, under Picture Tools, on the Format tab, in the Size group, click the Size and Position dialog box launcher. In the Format Picture dialog box, resize or crop the image so that the height is set to 1.2 and the width is set to To crop the picture, click Crop in the left pane, and in the right pane, under Crop position, enter values into the Height, Width, Left, and Top boxes. To resize the picture, click Size in the left pane, and in the right pane, under Size and rotate, enter values into the Height and Width boxes. Also in the Format Picture dialog box, click 3-D Format in the left pane, and then, in the 3-D Format pane, do the following: Under Bevel, click the button next to Top and click Circle (first row, first option from the left). Under Surface, click the button next to Material, and then under Standard click Metal (fourth option from the left). Click the button next to Lighting, and then under Neutral click Contrasting (second row, second option from the left). In the Angle box, enter 25°. Also in the Format Picture dialog box, click Shadow in the left pane. In the Shadow pane, click the button next to Presets, under Outer click Offset Diagonal Bottom Left (first row, third option from the left), and then do the following: In the Transparency box, enter 77%. In the Size box, enter 100%. In the Blur box, enter 10 pt. In the Angle box, enter 141°. In the Distance box, enter 10 pt. On the slide, drag the picture onto the curve, near the top. On the Insert tab, in the Text group, click Text Box. On the slide, drag to draw the text box. Enter text in the text box and select it. On the Home tab, in the Font group, do the following: In the Font list, select Corbel. In the Font Size box, enter 22. Click the arrow next to Font Color, and then under Theme Colors click White, Background 1, Darker 50% (sixth row, first option from the left). On the Home tab, in the Paragraph group, click Align Text Left to align the text left in the text box. On the slide, drag the text box to the right of the picture. To reproduce the animation effects on this slide, do the following: It will help to zoom out in order to view the area off the slide. On the View tab, in the Zoom group, click Zoom. In the Zoom dialog box, select 65%. On the Animations tab, in the Advanced Animation group, click Add Animation, and then click More Entrance Effects. In the Add Entrance Effect dialog box, under Moderate, click Grow & Turn, and then click OK. On the Animations tab, in the Timing group, in the Start list, select With Previous. On the Animations tab, in the Timing group, in the Duration box, enter 1. On the Animations tab, in the Advanced Animation group, click Add Animation, and then under Motion Paths click Arcs. On the Animations tab, in the Animation group, click Effect Options, and then click Right. On the Animations tab, in the Animation group, click Effect Options, and then click Reverse Path Direction. On the slide, select the arc effect path, and then drag the bottom sizing handle below the bottom of the slide. Drag the right side sizing handle to the left until the path curve approximately matches the curve of the modified triangle. Drag the green rotation handle to the left to rotate the arc path to match the curve of the modified triangle. Drag the arc path so that the red arrow is in the center of the picture. You may need to make further adjustments to the length, width, and angle of the arc path to match the curve of the modified triangle. On the slide, select the text box. On the Animations tab, in the Advanced Animation group, click Add Animation, and then under Entrance click Fade. On the Animations tab, in the Timing group, in the Start list, select After Previous. To reproduce the other animated pictures and text boxes on this slide, do the following: On the Animations tab, in the Advanced Animation group, click Animation Pane. On the slide, press and hold CTRL and then select the picture and the text box. On the Home tab, in the Clipboard group, click the arrow next to Copy, and then click Duplicate. On the slide, drag the duplicate picture and text onto the curve below the first group. On the slide, select the duplicate picture. Under Picture Tools, on the Format tab, in the Adjust group, click Change Picture. In the Insert Picture dialog box, select a picture, and then click Insert. Under Picture Tools, on the Format tab, in the Size group, click the Size and Position dialog box launcher. In the Format Picture dialog box, resize or crop the image so that the height is set to 1.2 and the width is set to To crop the picture, click Crop in the left pane, and in the right pane, under Crop position, enter values into the Height, Width, Left, and Top boxes. To resize the picture, click Size in the left pane, and in the right pane, under Size and rotate, enter values into the Height and Width boxes. In the Animation Pane, click the Arc animation effect for the new picture. Drag the green rotation handle to the right to rotate the arc path to match the curve of the modified triangle. Drag the arc path so that the red arrow is in the center of the picture. Click in the duplicate text box and edit the text. Repeat steps 2-7 two more times to reproduce the third and fourth pictures and text boxes with animation effects. 檢查角度與求職信.")
6
履歷種類與格式:電子履歷、一般履歷與自備中英文履歷
前言:履歷表之定位 履歷種類與格式:電子履歷、一般履歷與自備中英文履歷 中文自傳 Animated picture buttons grow and turn on path (Advanced) To reproduce the curved shape on this slide, do the following: On the Home tab, in the Slides group, click Layout, and then click Blank. On the Home tab, in the Drawing group, click Shapes, and then under Basic Shapes click Right Triangle (first row, fourth option from the left). On the slide, draw a triangle. Under Drawing Tools, on the Format tab, in the Size group, enter 7.5” into the Height box and enter 4.75” into the Width box. On the Home tab, in the Drawing group, click Arrange, point to Align, and then do the following: Click Align Middle. Click Align Left. On the slide, select the triangle. Under Drawing Tools, on the Format tab, in the Insert Shapes group, click Edit Shape, and then click Edit Points. Right-click the diagonal side of the triangle, and then click Curved Segment. Click the bottom right corner of the triangle and then move the curve adjustment handle to create a consistent curve. Also on the Format tab, in the Shape Styles group, click Shape Fill, and then under Theme Colors click White, Background 1 (first row, first option from the left). Also on the Format tab, in the Shape Styles group, click Shape Outline, and then click No Outline. To reproduce the background effects on this slide, do the following: On the Design tab, in the Background group, click Background Styles, and then click Format Background. In the Format Background dialog box, click Fill in the left pane, select Gradient fill in the Fill pane, and then do the following: In the Type list, select Linear. In the Angle box, enter 225. Under Gradient stops, click Add gradient stops or Remove gradient stops until two stops appear in the slider. Also under Gradient stops, customize the gradient stops as follows: Select the first stop in the slider, and then do the following: In the Position box, enter 0%. Click the button next to Color, and then under Theme Colors click White, Background 1 (first row, first option from the left). In the Transparency box, enter 0%. In the Position box, enter 100%. Click the button next to Color, click More Colors, and then in the Colors dialog box, on the Custom tab, enter values for Red: 230, Green: 230, Blue: 230. To reproduce the picture and text effects on this slide, do the following: On the Insert tab, in the Images group, click Picture. In the Insert Picture dialog box, select a picture, and then click Insert. On the slide, select the picture. Under Picture Tools, on the Format tab, in the Size group, click the arrow under Crop, click Crop to Shape, and then under Basic Shapes click Oval (first option from the left). With the picture still selected, under Picture Tools, on the Format tab, in the Size group, click the Size and Position dialog box launcher. In the Format Picture dialog box, resize or crop the image so that the height is set to 1.2” and the width is set to 1.2”. To crop the picture, click Crop in the left pane, and in the right pane, under Crop position, enter values into the Height, Width, Left, and Top boxes. To resize the picture, click Size in the left pane, and in the right pane, under Size and rotate, enter values into the Height and Width boxes. Also in the Format Picture dialog box, click 3-D Format in the left pane, and then, in the 3-D Format pane, do the following: Under Bevel, click the button next to Top and click Circle (first row, first option from the left). Under Surface, click the button next to Material, and then under Standard click Metal (fourth option from the left). Click the button next to Lighting, and then under Neutral click Contrasting (second row, second option from the left). In the Angle box, enter 25°. Also in the Format Picture dialog box, click Shadow in the left pane. In the Shadow pane, click the button next to Presets, under Outer click Offset Diagonal Bottom Left (first row, third option from the left), and then do the following: In the Transparency box, enter 77%. In the Size box, enter 100%. In the Blur box, enter 10 pt. In the Angle box, enter 141°. In the Distance box, enter 10 pt. On the slide, drag the picture onto the curve, near the top. On the Insert tab, in the Text group, click Text Box. On the slide, drag to draw the text box. Enter text in the text box and select it. On the Home tab, in the Font group, do the following: In the Font list, select Corbel. In the Font Size box, enter 22. Click the arrow next to Font Color, and then under Theme Colors click White, Background 1, Darker 50% (sixth row, first option from the left). On the Home tab, in the Paragraph group, click Align Text Left to align the text left in the text box. On the slide, drag the text box to the right of the picture. To reproduce the animation effects on this slide, do the following: It will help to zoom out in order to view the area off the slide. On the View tab, in the Zoom group, click Zoom. In the Zoom dialog box, select 65%. On the Animations tab, in the Advanced Animation group, click Add Animation, and then click More Entrance Effects. In the Add Entrance Effect dialog box, under Moderate, click Grow & Turn, and then click OK. On the Animations tab, in the Timing group, in the Start list, select With Previous. On the Animations tab, in the Timing group, in the Duration box, enter 1. On the Animations tab, in the Advanced Animation group, click Add Animation, and then under Motion Paths click Arcs. On the Animations tab, in the Animation group, click Effect Options, and then click Right. On the Animations tab, in the Animation group, click Effect Options, and then click Reverse Path Direction. On the slide, select the arc effect path, and then drag the bottom sizing handle below the bottom of the slide. Drag the right side sizing handle to the left until the path curve approximately matches the curve of the modified triangle. Drag the green rotation handle to the left to rotate the arc path to match the curve of the modified triangle. Drag the arc path so that the red arrow is in the center of the picture. You may need to make further adjustments to the length, width, and angle of the arc path to match the curve of the modified triangle. On the slide, select the text box. On the Animations tab, in the Advanced Animation group, click Add Animation, and then under Entrance click Fade. On the Animations tab, in the Timing group, in the Start list, select After Previous. To reproduce the other animated pictures and text boxes on this slide, do the following: On the Animations tab, in the Advanced Animation group, click Animation Pane. On the slide, press and hold CTRL and then select the picture and the text box. On the Home tab, in the Clipboard group, click the arrow next to Copy, and then click Duplicate. On the slide, drag the duplicate picture and text onto the curve below the first group. On the slide, select the duplicate picture. Under Picture Tools, on the Format tab, in the Adjust group, click Change Picture. In the Insert Picture dialog box, select a picture, and then click Insert. Under Picture Tools, on the Format tab, in the Size group, click the Size and Position dialog box launcher. In the Format Picture dialog box, resize or crop the image so that the height is set to 1.2” and the width is set to 1.2”. To crop the picture, click Crop in the left pane, and in the right pane, under Crop position, enter values into the Height, Width, Left, and Top boxes. To resize the picture, click Size in the left pane, and in the right pane, under Size and rotate, enter values into the Height and Width boxes. In the Animation Pane, click the Arc animation effect for the new picture. Drag the green rotation handle to the right to rotate the arc path to match the curve of the modified triangle. Drag the arc path so that the red arrow is in the center of the picture. Click in the duplicate text box and edit the text. Repeat steps 2-7 two more times to reproduce the third and fourth pictures and text boxes with animation effects. 檢查角度與求職信
 To reproduce the curved shape on this slide, do the following: On the Home tab, in the Slides group, click Layout, and then click Blank. On the Home tab, in the Drawing group, click Shapes, and then under Basic Shapes click Right Triangle (first row, fourth option from the left). On the slide, draw a triangle. Under Drawing Tools, on the Format tab, in the Size group, enter 7.5 into the Height box and enter 4.75 into the Width box. On the Home tab, in the Drawing group, click Arrange, point to Align, and then do the following: Click Align Middle. Click Align Left. On the slide, select the triangle. Under Drawing Tools, on the Format tab, in the Insert Shapes group, click Edit Shape, and then click Edit Points. Right-click the diagonal side of the triangle, and then click Curved Segment. Click the bottom right corner of the triangle and then move the curve adjustment handle to create a consistent curve. Also on the Format tab, in the Shape Styles group, click Shape Fill, and then under Theme Colors click White, Background 1 (first row, first option from the left). Also on the Format tab, in the Shape Styles group, click Shape Outline, and then click No Outline. To reproduce the background effects on this slide, do the following: On the Design tab, in the Background group, click Background Styles, and then click Format Background. In the Format Background dialog box, click Fill in the left pane, select Gradient fill in the Fill pane, and then do the following: In the Type list, select Linear. In the Angle box, enter 225. Under Gradient stops, click Add gradient stops or Remove gradient stops until two stops appear in the slider. Also under Gradient stops, customize the gradient stops as follows: Select the first stop in the slider, and then do the following: In the Position box, enter 0%. Click the button next to Color, and then under Theme Colors click White, Background 1 (first row, first option from the left). In the Transparency box, enter 0%. In the Position box, enter 100%. Click the button next to Color, click More Colors, and then in the Colors dialog box, on the Custom tab, enter values for Red: 230, Green: 230, Blue: 230. To reproduce the picture and text effects on this slide, do the following: On the Insert tab, in the Images group, click Picture. In the Insert Picture dialog box, select a picture, and then click Insert. On the slide, select the picture. Under Picture Tools, on the Format tab, in the Size group, click the arrow under Crop, click Crop to Shape, and then under Basic Shapes click Oval (first option from the left). With the picture still selected, under Picture Tools, on the Format tab, in the Size group, click the Size and Position dialog box launcher. In the Format Picture dialog box, resize or crop the image so that the height is set to 1.2 and the width is set to To crop the picture, click Crop in the left pane, and in the right pane, under Crop position, enter values into the Height, Width, Left, and Top boxes. To resize the picture, click Size in the left pane, and in the right pane, under Size and rotate, enter values into the Height and Width boxes. Also in the Format Picture dialog box, click 3-D Format in the left pane, and then, in the 3-D Format pane, do the following: Under Bevel, click the button next to Top and click Circle (first row, first option from the left). Under Surface, click the button next to Material, and then under Standard click Metal (fourth option from the left). Click the button next to Lighting, and then under Neutral click Contrasting (second row, second option from the left). In the Angle box, enter 25°. Also in the Format Picture dialog box, click Shadow in the left pane. In the Shadow pane, click the button next to Presets, under Outer click Offset Diagonal Bottom Left (first row, third option from the left), and then do the following: In the Transparency box, enter 77%. In the Size box, enter 100%. In the Blur box, enter 10 pt. In the Angle box, enter 141°. In the Distance box, enter 10 pt. On the slide, drag the picture onto the curve, near the top. On the Insert tab, in the Text group, click Text Box. On the slide, drag to draw the text box. Enter text in the text box and select it. On the Home tab, in the Font group, do the following: In the Font list, select Corbel. In the Font Size box, enter 22. Click the arrow next to Font Color, and then under Theme Colors click White, Background 1, Darker 50% (sixth row, first option from the left). On the Home tab, in the Paragraph group, click Align Text Left to align the text left in the text box. On the slide, drag the text box to the right of the picture. To reproduce the animation effects on this slide, do the following: It will help to zoom out in order to view the area off the slide. On the View tab, in the Zoom group, click Zoom. In the Zoom dialog box, select 65%. On the Animations tab, in the Advanced Animation group, click Add Animation, and then click More Entrance Effects. In the Add Entrance Effect dialog box, under Moderate, click Grow & Turn, and then click OK. On the Animations tab, in the Timing group, in the Start list, select With Previous. On the Animations tab, in the Timing group, in the Duration box, enter 1. On the Animations tab, in the Advanced Animation group, click Add Animation, and then under Motion Paths click Arcs. On the Animations tab, in the Animation group, click Effect Options, and then click Right. On the Animations tab, in the Animation group, click Effect Options, and then click Reverse Path Direction. On the slide, select the arc effect path, and then drag the bottom sizing handle below the bottom of the slide. Drag the right side sizing handle to the left until the path curve approximately matches the curve of the modified triangle. Drag the green rotation handle to the left to rotate the arc path to match the curve of the modified triangle. Drag the arc path so that the red arrow is in the center of the picture. You may need to make further adjustments to the length, width, and angle of the arc path to match the curve of the modified triangle. On the slide, select the text box. On the Animations tab, in the Advanced Animation group, click Add Animation, and then under Entrance click Fade. On the Animations tab, in the Timing group, in the Start list, select After Previous. To reproduce the other animated pictures and text boxes on this slide, do the following: On the Animations tab, in the Advanced Animation group, click Animation Pane. On the slide, press and hold CTRL and then select the picture and the text box. On the Home tab, in the Clipboard group, click the arrow next to Copy, and then click Duplicate. On the slide, drag the duplicate picture and text onto the curve below the first group. On the slide, select the duplicate picture. Under Picture Tools, on the Format tab, in the Adjust group, click Change Picture. In the Insert Picture dialog box, select a picture, and then click Insert. Under Picture Tools, on the Format tab, in the Size group, click the Size and Position dialog box launcher. In the Format Picture dialog box, resize or crop the image so that the height is set to 1.2 and the width is set to To crop the picture, click Crop in the left pane, and in the right pane, under Crop position, enter values into the Height, Width, Left, and Top boxes. To resize the picture, click Size in the left pane, and in the right pane, under Size and rotate, enter values into the Height and Width boxes. In the Animation Pane, click the Arc animation effect for the new picture. Drag the green rotation handle to the right to rotate the arc path to match the curve of the modified triangle. Drag the arc path so that the red arrow is in the center of the picture. Click in the duplicate text box and edit the text. Repeat steps 2-7 two more times to reproduce the third and fourth pictures and text boxes with animation effects. 檢查角度與求職信.")
7
這不是我(要)的履歷表!
的履歷表!")
8
平均每份履歷閱讀時間 只有15~30秒

9
履歷表的定位 為了避免冤枉路,冀望能「出師告捷」,在動手製作履歷表之前,先來釐清觀念,準確認知「履歷表的定位」: 俯視「求職」這件事,本質與商業行為無異,也就是一方求售、一方求貨。企業是買主,挑精撿肥尋覓好貨色;人才是商品,充實了內涵、做好包裝,待價而沽。 濃縮完整的個人資料,借著撰寫履歷表,求職者重新審視自己的過去、客觀檢驗,盤算手中擁有哪些籌碼、應該補充哪些能量,同時,也為面談預作好準備。 9

10
履歷種類與格式:電子履歷、一般履歷與自備中英文履歷
前言:履歷表之定位 履歷種類與格式:電子履歷、一般履歷與自備中英文履歷 中文自傳 Animated picture buttons grow and turn on path (Advanced) To reproduce the curved shape on this slide, do the following: On the Home tab, in the Slides group, click Layout, and then click Blank. On the Home tab, in the Drawing group, click Shapes, and then under Basic Shapes click Right Triangle (first row, fourth option from the left). On the slide, draw a triangle. Under Drawing Tools, on the Format tab, in the Size group, enter 7.5” into the Height box and enter 4.75” into the Width box. On the Home tab, in the Drawing group, click Arrange, point to Align, and then do the following: Click Align Middle. Click Align Left. On the slide, select the triangle. Under Drawing Tools, on the Format tab, in the Insert Shapes group, click Edit Shape, and then click Edit Points. Right-click the diagonal side of the triangle, and then click Curved Segment. Click the bottom right corner of the triangle and then move the curve adjustment handle to create a consistent curve. Also on the Format tab, in the Shape Styles group, click Shape Fill, and then under Theme Colors click White, Background 1 (first row, first option from the left). Also on the Format tab, in the Shape Styles group, click Shape Outline, and then click No Outline. To reproduce the background effects on this slide, do the following: On the Design tab, in the Background group, click Background Styles, and then click Format Background. In the Format Background dialog box, click Fill in the left pane, select Gradient fill in the Fill pane, and then do the following: In the Type list, select Linear. In the Angle box, enter 225. Under Gradient stops, click Add gradient stops or Remove gradient stops until two stops appear in the slider. Also under Gradient stops, customize the gradient stops as follows: Select the first stop in the slider, and then do the following: In the Position box, enter 0%. Click the button next to Color, and then under Theme Colors click White, Background 1 (first row, first option from the left). In the Transparency box, enter 0%. In the Position box, enter 100%. Click the button next to Color, click More Colors, and then in the Colors dialog box, on the Custom tab, enter values for Red: 230, Green: 230, Blue: 230. To reproduce the picture and text effects on this slide, do the following: On the Insert tab, in the Images group, click Picture. In the Insert Picture dialog box, select a picture, and then click Insert. On the slide, select the picture. Under Picture Tools, on the Format tab, in the Size group, click the arrow under Crop, click Crop to Shape, and then under Basic Shapes click Oval (first option from the left). With the picture still selected, under Picture Tools, on the Format tab, in the Size group, click the Size and Position dialog box launcher. In the Format Picture dialog box, resize or crop the image so that the height is set to 1.2” and the width is set to 1.2”. To crop the picture, click Crop in the left pane, and in the right pane, under Crop position, enter values into the Height, Width, Left, and Top boxes. To resize the picture, click Size in the left pane, and in the right pane, under Size and rotate, enter values into the Height and Width boxes. Also in the Format Picture dialog box, click 3-D Format in the left pane, and then, in the 3-D Format pane, do the following: Under Bevel, click the button next to Top and click Circle (first row, first option from the left). Under Surface, click the button next to Material, and then under Standard click Metal (fourth option from the left). Click the button next to Lighting, and then under Neutral click Contrasting (second row, second option from the left). In the Angle box, enter 25°. Also in the Format Picture dialog box, click Shadow in the left pane. In the Shadow pane, click the button next to Presets, under Outer click Offset Diagonal Bottom Left (first row, third option from the left), and then do the following: In the Transparency box, enter 77%. In the Size box, enter 100%. In the Blur box, enter 10 pt. In the Angle box, enter 141°. In the Distance box, enter 10 pt. On the slide, drag the picture onto the curve, near the top. On the Insert tab, in the Text group, click Text Box. On the slide, drag to draw the text box. Enter text in the text box and select it. On the Home tab, in the Font group, do the following: In the Font list, select Corbel. In the Font Size box, enter 22. Click the arrow next to Font Color, and then under Theme Colors click White, Background 1, Darker 50% (sixth row, first option from the left). On the Home tab, in the Paragraph group, click Align Text Left to align the text left in the text box. On the slide, drag the text box to the right of the picture. To reproduce the animation effects on this slide, do the following: It will help to zoom out in order to view the area off the slide. On the View tab, in the Zoom group, click Zoom. In the Zoom dialog box, select 65%. On the Animations tab, in the Advanced Animation group, click Add Animation, and then click More Entrance Effects. In the Add Entrance Effect dialog box, under Moderate, click Grow & Turn, and then click OK. On the Animations tab, in the Timing group, in the Start list, select With Previous. On the Animations tab, in the Timing group, in the Duration box, enter 1. On the Animations tab, in the Advanced Animation group, click Add Animation, and then under Motion Paths click Arcs. On the Animations tab, in the Animation group, click Effect Options, and then click Right. On the Animations tab, in the Animation group, click Effect Options, and then click Reverse Path Direction. On the slide, select the arc effect path, and then drag the bottom sizing handle below the bottom of the slide. Drag the right side sizing handle to the left until the path curve approximately matches the curve of the modified triangle. Drag the green rotation handle to the left to rotate the arc path to match the curve of the modified triangle. Drag the arc path so that the red arrow is in the center of the picture. You may need to make further adjustments to the length, width, and angle of the arc path to match the curve of the modified triangle. On the slide, select the text box. On the Animations tab, in the Advanced Animation group, click Add Animation, and then under Entrance click Fade. On the Animations tab, in the Timing group, in the Start list, select After Previous. To reproduce the other animated pictures and text boxes on this slide, do the following: On the Animations tab, in the Advanced Animation group, click Animation Pane. On the slide, press and hold CTRL and then select the picture and the text box. On the Home tab, in the Clipboard group, click the arrow next to Copy, and then click Duplicate. On the slide, drag the duplicate picture and text onto the curve below the first group. On the slide, select the duplicate picture. Under Picture Tools, on the Format tab, in the Adjust group, click Change Picture. In the Insert Picture dialog box, select a picture, and then click Insert. Under Picture Tools, on the Format tab, in the Size group, click the Size and Position dialog box launcher. In the Format Picture dialog box, resize or crop the image so that the height is set to 1.2” and the width is set to 1.2”. To crop the picture, click Crop in the left pane, and in the right pane, under Crop position, enter values into the Height, Width, Left, and Top boxes. To resize the picture, click Size in the left pane, and in the right pane, under Size and rotate, enter values into the Height and Width boxes. In the Animation Pane, click the Arc animation effect for the new picture. Drag the green rotation handle to the right to rotate the arc path to match the curve of the modified triangle. Drag the arc path so that the red arrow is in the center of the picture. Click in the duplicate text box and edit the text. Repeat steps 2-7 two more times to reproduce the third and fourth pictures and text boxes with animation effects. 檢查角度與求職信 10
 To reproduce the curved shape on this slide, do the following: On the Home tab, in the Slides group, click Layout, and then click Blank. On the Home tab, in the Drawing group, click Shapes, and then under Basic Shapes click Right Triangle (first row, fourth option from the left). On the slide, draw a triangle. Under Drawing Tools, on the Format tab, in the Size group, enter 7.5 into the Height box and enter 4.75 into the Width box. On the Home tab, in the Drawing group, click Arrange, point to Align, and then do the following: Click Align Middle. Click Align Left. On the slide, select the triangle. Under Drawing Tools, on the Format tab, in the Insert Shapes group, click Edit Shape, and then click Edit Points. Right-click the diagonal side of the triangle, and then click Curved Segment. Click the bottom right corner of the triangle and then move the curve adjustment handle to create a consistent curve. Also on the Format tab, in the Shape Styles group, click Shape Fill, and then under Theme Colors click White, Background 1 (first row, first option from the left). Also on the Format tab, in the Shape Styles group, click Shape Outline, and then click No Outline. To reproduce the background effects on this slide, do the following: On the Design tab, in the Background group, click Background Styles, and then click Format Background. In the Format Background dialog box, click Fill in the left pane, select Gradient fill in the Fill pane, and then do the following: In the Type list, select Linear. In the Angle box, enter 225. Under Gradient stops, click Add gradient stops or Remove gradient stops until two stops appear in the slider. Also under Gradient stops, customize the gradient stops as follows: Select the first stop in the slider, and then do the following: In the Position box, enter 0%. Click the button next to Color, and then under Theme Colors click White, Background 1 (first row, first option from the left). In the Transparency box, enter 0%. In the Position box, enter 100%. Click the button next to Color, click More Colors, and then in the Colors dialog box, on the Custom tab, enter values for Red: 230, Green: 230, Blue: 230. To reproduce the picture and text effects on this slide, do the following: On the Insert tab, in the Images group, click Picture. In the Insert Picture dialog box, select a picture, and then click Insert. On the slide, select the picture. Under Picture Tools, on the Format tab, in the Size group, click the arrow under Crop, click Crop to Shape, and then under Basic Shapes click Oval (first option from the left). With the picture still selected, under Picture Tools, on the Format tab, in the Size group, click the Size and Position dialog box launcher. In the Format Picture dialog box, resize or crop the image so that the height is set to 1.2 and the width is set to To crop the picture, click Crop in the left pane, and in the right pane, under Crop position, enter values into the Height, Width, Left, and Top boxes. To resize the picture, click Size in the left pane, and in the right pane, under Size and rotate, enter values into the Height and Width boxes. Also in the Format Picture dialog box, click 3-D Format in the left pane, and then, in the 3-D Format pane, do the following: Under Bevel, click the button next to Top and click Circle (first row, first option from the left). Under Surface, click the button next to Material, and then under Standard click Metal (fourth option from the left). Click the button next to Lighting, and then under Neutral click Contrasting (second row, second option from the left). In the Angle box, enter 25°. Also in the Format Picture dialog box, click Shadow in the left pane. In the Shadow pane, click the button next to Presets, under Outer click Offset Diagonal Bottom Left (first row, third option from the left), and then do the following: In the Transparency box, enter 77%. In the Size box, enter 100%. In the Blur box, enter 10 pt. In the Angle box, enter 141°. In the Distance box, enter 10 pt. On the slide, drag the picture onto the curve, near the top. On the Insert tab, in the Text group, click Text Box. On the slide, drag to draw the text box. Enter text in the text box and select it. On the Home tab, in the Font group, do the following: In the Font list, select Corbel. In the Font Size box, enter 22. Click the arrow next to Font Color, and then under Theme Colors click White, Background 1, Darker 50% (sixth row, first option from the left). On the Home tab, in the Paragraph group, click Align Text Left to align the text left in the text box. On the slide, drag the text box to the right of the picture. To reproduce the animation effects on this slide, do the following: It will help to zoom out in order to view the area off the slide. On the View tab, in the Zoom group, click Zoom. In the Zoom dialog box, select 65%. On the Animations tab, in the Advanced Animation group, click Add Animation, and then click More Entrance Effects. In the Add Entrance Effect dialog box, under Moderate, click Grow & Turn, and then click OK. On the Animations tab, in the Timing group, in the Start list, select With Previous. On the Animations tab, in the Timing group, in the Duration box, enter 1. On the Animations tab, in the Advanced Animation group, click Add Animation, and then under Motion Paths click Arcs. On the Animations tab, in the Animation group, click Effect Options, and then click Right. On the Animations tab, in the Animation group, click Effect Options, and then click Reverse Path Direction. On the slide, select the arc effect path, and then drag the bottom sizing handle below the bottom of the slide. Drag the right side sizing handle to the left until the path curve approximately matches the curve of the modified triangle. Drag the green rotation handle to the left to rotate the arc path to match the curve of the modified triangle. Drag the arc path so that the red arrow is in the center of the picture. You may need to make further adjustments to the length, width, and angle of the arc path to match the curve of the modified triangle. On the slide, select the text box. On the Animations tab, in the Advanced Animation group, click Add Animation, and then under Entrance click Fade. On the Animations tab, in the Timing group, in the Start list, select After Previous. To reproduce the other animated pictures and text boxes on this slide, do the following: On the Animations tab, in the Advanced Animation group, click Animation Pane. On the slide, press and hold CTRL and then select the picture and the text box. On the Home tab, in the Clipboard group, click the arrow next to Copy, and then click Duplicate. On the slide, drag the duplicate picture and text onto the curve below the first group. On the slide, select the duplicate picture. Under Picture Tools, on the Format tab, in the Adjust group, click Change Picture. In the Insert Picture dialog box, select a picture, and then click Insert. Under Picture Tools, on the Format tab, in the Size group, click the Size and Position dialog box launcher. In the Format Picture dialog box, resize or crop the image so that the height is set to 1.2 and the width is set to To crop the picture, click Crop in the left pane, and in the right pane, under Crop position, enter values into the Height, Width, Left, and Top boxes. To resize the picture, click Size in the left pane, and in the right pane, under Size and rotate, enter values into the Height and Width boxes. In the Animation Pane, click the Arc animation effect for the new picture. Drag the green rotation handle to the right to rotate the arc path to match the curve of the modified triangle. Drag the arc path so that the red arrow is in the center of the picture. Click in the duplicate text box and edit the text. Repeat steps 2-7 two more times to reproduce the third and fourth pictures and text boxes with animation effects. 檢查角度與求職信. 10.")
11
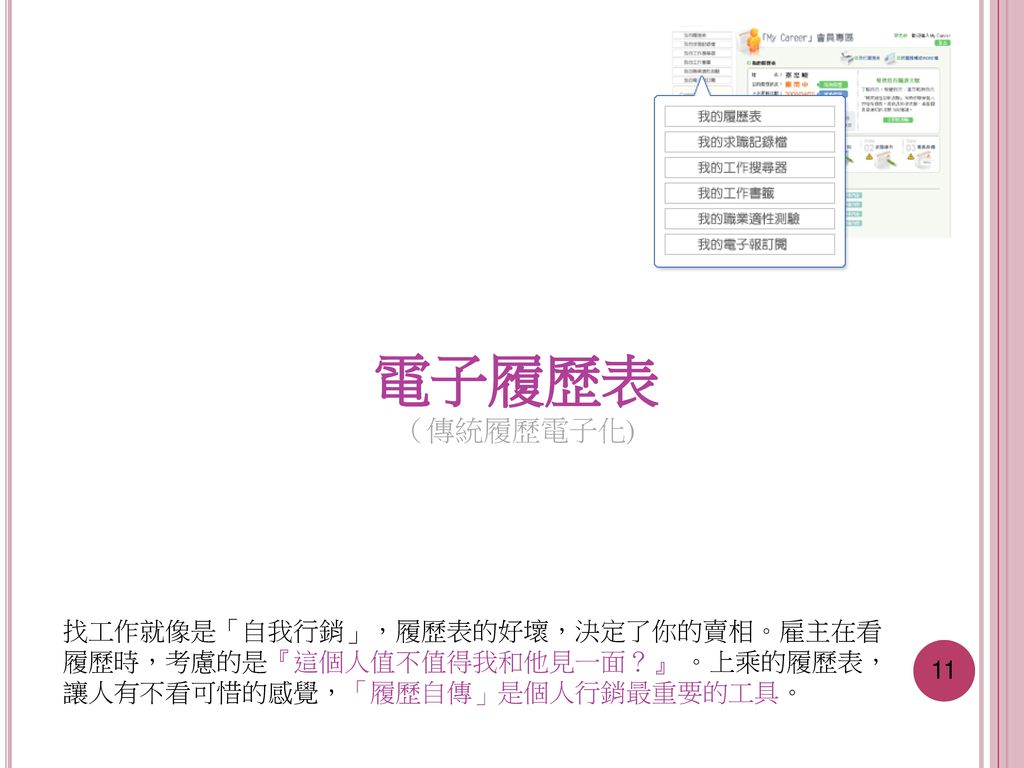
25/02/2017 電子履歷表 (傳統履歷電子化) 找工作就像是「自我行銷」,履歷表的好壞,決定了你的賣相。雇主在看履歷時,考慮的是『這個人值不值得我和他見一面?』 。上乘的履歷表,讓人有不看可惜的感覺,「履歷自傳」是個人行銷最重要的工具。 11 11 11
12
電子履歷表 注意事項 填完所有必填欄位。 善用網路特性,如:關鍵字。
差異性:全民英檢、學校成績、取得證照、得獎競賽、成果作品、社團參與、學生幹部、遊學經驗、義工服務、推薦信等。 「自傳」、「附件」。 12

13
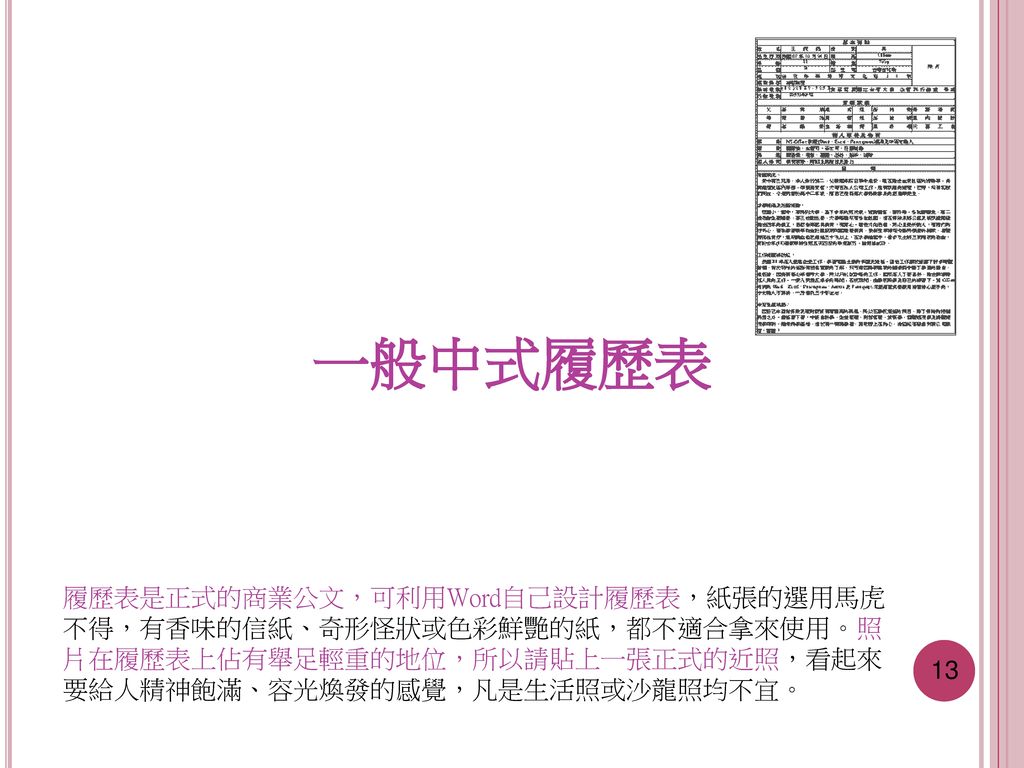
25/02/2017 一般中式履歷表 履歷表是正式的商業公文,可利用Word自己設計履歷表,紙張的選用馬虎不得,有香味的信紙、奇形怪狀或色彩鮮艷的紙,都不適合拿來使用。照片在履歷表上佔有舉足輕重的地位,所以請貼上一張正式的近照,看起來要給人精神飽滿、容光煥發的感覺,凡是生活照或沙龍照均不宜。 13 13 13
14
一般中式履歷表 履歷表精靈的使用-履歷表 14

15
雇主提供中文制式履歷-注意要點 工作地點: (本人同意日後配合院方政策,轉調至本醫療機構 現有及將來之工作地點)
有否罹患嚴重、慢性疾病或長期用藥之習慣? (新人體檢若有 法定傳染病之虞者,依【勞工安全衛生法】不予錄用。) 是否與本醫療機構現職人員有親戚或朋友(介紹人)關係? 是否同意推介至本醫療機構各事業群及其關係企業? 過去是否曾涉及民刑事案件或有不良債信,遭金融機構拒絕往 來等記錄? 15
 是否與本醫療機構現職人員有親戚或朋友(介紹人)關係? 是否同意推介至本醫療機構各事業群及其關係企業? 過去是否曾涉及民刑事案件或有不良債信,遭金融機構拒絕往 來等記錄? 15.")
16
25/02/2017 問答題─ 自備之中英履歷表 英文履歷表不是直接從中文翻譯過來,這有一定格式存在。除非是應徵公部門,或雇主已提供中文制式履歷,否則建議是由英式履歷表繕寫過後,再翻成中文較宜。此種履歷表看起來一目了然、切中要點,也是留學或獵頭公司所使用的格式。 16 16 16
17
中英履歷CV範本 護理人員範本 – 王伊蓮 業界參考範本 x 3 17

18
工作內容專業化 ─ 優質化(中文) 勞委會職訓局之職業分類資訊查詢系統:
18

19
工作內容專業化 ─ 優質化(中文) 職業代碼 2231.01 職業名稱 一般護理師 一般性描述
具有護理師資格,應用專業護理知識及技能,從事專業性護理服務、實習指導、研究發展、管理及輔導等工作,以達到減輕病人痛苦、恢復健康、預防疾病、增進健康、提高人類健康至最高標準之目的之工作人員屬之。 工作內容 (1)在醫院、衛生局所、診所、社區、學校、工廠、家庭或其他機構,提供基本性、診斷性、治療性、特殊性臨床護理服務; (2)對病人及家屬實行衛生教育; (3)提供社區護理服務,包括預防、保健、教育、復健、治療性之護理; (4)施行或參與急救工作; (5)護理及其他醫事學生有關護理之實習指導工作; (6)有關護理之研究發展工作; (7)護理行政管理及人員輔導工作。 19
在醫院、衛生局所、診所、社區、學校、工廠、家庭或其他機構,提供基本性、診斷性、治療性、特殊性臨床護理服務; (2)對病人及家屬實行衛生教育; (3)提供社區護理服務,包括預防、保健、教育、復健、治療性之護理; (4)施行或參與急救工作; (5)護理及其他醫事學生有關護理之實習指導工作; (6)有關護理之研究發展工作; (7)護理行政管理及人員輔導工作。 19.")
20
工作內容專業化 ─ 優質化(英文) 20
 20")
21
工作內容專業化 ─ 優質化(英文) 21
 21")
22
工作內容專業化 ─ 優質化(英文) 22
 22")
23
上Google,找出英式CV Log on to and type in nurse practitioner CV in search of the right one. 23

24
英文履歷產生器 英文履歷 英文自傳 24

25
25

26
26

27
貢獻價值之表現方式 -動詞 以強而有力的「動詞」為訴求: 執行/編撰/審查/觀察/修訂 操作/建議/草擬/解釋/參與
安排/完成/盤點/採購/測試/提案 記錄/查核/提供/維護/核對/蒐集 分析/評估/彙整/改善/簽訂/洽詢 27

28
工作價值與成果 ─ 數量化 以執行新藥臨床試驗的研究護士為例: 一般敘述 加以量化 執行新藥臨床試驗收案: 執行新藥臨床試驗收案
專案年平均執行3.6 個試驗案,平均各為2件,每月平均新收個案為5.6例、平均接受monitor 2.1 次。 執行新藥臨床試驗收案 28

29
工作價值與成果 ─ 數量化 一般敘述 加以量化 增加專案客戶從每星期20名至 增加專案客戶與降低行銷 50名,同時減低行銷成本 成本。
50%。 tThis is an example text. Go ahead and replace it with your own text. tThis is an example text. Go ahead and replace it with your own text. This is an example text. Go ahead and replace it with your own text. 設計行銷計畫,增加媒體 正面報導。 半年內,推出有效之行銷計畫 使媒體正面報導增加200%。 領導跨部門團隊,減少網站 託管成本。 領導跨部門團隊,施行預設之 3個月主機託管方案,使成本 降低75%。 29

30
貢獻價值之表現方式 -形容詞 減少使用形容詞來表達自己的優點,必須要拿出過去的學、經 歷來舉證。從行動散發出的特質,絕對比在履歷表填寫美好的 形容詞更有意義。 刻意將這些與議題相關的形容詞填入履歷表中,導致履歷表非 常空洞甚至華而不實,造成了反效果。 求職者是不是夠主動積極,從履歷表設計中就能看出。 【經濟日報/吳嵩浩/ 】 30

31
履歷種類與格式:電子履歷、一般履歷與自備中英文履歷
前言:履歷表之定位 履歷種類與格式:電子履歷、一般履歷與自備中英文履歷 中文自傳 Animated picture buttons grow and turn on path (Advanced) To reproduce the curved shape on this slide, do the following: On the Home tab, in the Slides group, click Layout, and then click Blank. On the Home tab, in the Drawing group, click Shapes, and then under Basic Shapes click Right Triangle (first row, fourth option from the left). On the slide, draw a triangle. Under Drawing Tools, on the Format tab, in the Size group, enter 7.5” into the Height box and enter 4.75” into the Width box. On the Home tab, in the Drawing group, click Arrange, point to Align, and then do the following: Click Align Middle. Click Align Left. On the slide, select the triangle. Under Drawing Tools, on the Format tab, in the Insert Shapes group, click Edit Shape, and then click Edit Points. Right-click the diagonal side of the triangle, and then click Curved Segment. Click the bottom right corner of the triangle and then move the curve adjustment handle to create a consistent curve. Also on the Format tab, in the Shape Styles group, click Shape Fill, and then under Theme Colors click White, Background 1 (first row, first option from the left). Also on the Format tab, in the Shape Styles group, click Shape Outline, and then click No Outline. To reproduce the background effects on this slide, do the following: On the Design tab, in the Background group, click Background Styles, and then click Format Background. In the Format Background dialog box, click Fill in the left pane, select Gradient fill in the Fill pane, and then do the following: In the Type list, select Linear. In the Angle box, enter 225. Under Gradient stops, click Add gradient stops or Remove gradient stops until two stops appear in the slider. Also under Gradient stops, customize the gradient stops as follows: Select the first stop in the slider, and then do the following: In the Position box, enter 0%. Click the button next to Color, and then under Theme Colors click White, Background 1 (first row, first option from the left). In the Transparency box, enter 0%. In the Position box, enter 100%. Click the button next to Color, click More Colors, and then in the Colors dialog box, on the Custom tab, enter values for Red: 230, Green: 230, Blue: 230. To reproduce the picture and text effects on this slide, do the following: On the Insert tab, in the Images group, click Picture. In the Insert Picture dialog box, select a picture, and then click Insert. On the slide, select the picture. Under Picture Tools, on the Format tab, in the Size group, click the arrow under Crop, click Crop to Shape, and then under Basic Shapes click Oval (first option from the left). With the picture still selected, under Picture Tools, on the Format tab, in the Size group, click the Size and Position dialog box launcher. In the Format Picture dialog box, resize or crop the image so that the height is set to 1.2” and the width is set to 1.2”. To crop the picture, click Crop in the left pane, and in the right pane, under Crop position, enter values into the Height, Width, Left, and Top boxes. To resize the picture, click Size in the left pane, and in the right pane, under Size and rotate, enter values into the Height and Width boxes. Also in the Format Picture dialog box, click 3-D Format in the left pane, and then, in the 3-D Format pane, do the following: Under Bevel, click the button next to Top and click Circle (first row, first option from the left). Under Surface, click the button next to Material, and then under Standard click Metal (fourth option from the left). Click the button next to Lighting, and then under Neutral click Contrasting (second row, second option from the left). In the Angle box, enter 25°. Also in the Format Picture dialog box, click Shadow in the left pane. In the Shadow pane, click the button next to Presets, under Outer click Offset Diagonal Bottom Left (first row, third option from the left), and then do the following: In the Transparency box, enter 77%. In the Size box, enter 100%. In the Blur box, enter 10 pt. In the Angle box, enter 141°. In the Distance box, enter 10 pt. On the slide, drag the picture onto the curve, near the top. On the Insert tab, in the Text group, click Text Box. On the slide, drag to draw the text box. Enter text in the text box and select it. On the Home tab, in the Font group, do the following: In the Font list, select Corbel. In the Font Size box, enter 22. Click the arrow next to Font Color, and then under Theme Colors click White, Background 1, Darker 50% (sixth row, first option from the left). On the Home tab, in the Paragraph group, click Align Text Left to align the text left in the text box. On the slide, drag the text box to the right of the picture. To reproduce the animation effects on this slide, do the following: It will help to zoom out in order to view the area off the slide. On the View tab, in the Zoom group, click Zoom. In the Zoom dialog box, select 65%. On the Animations tab, in the Advanced Animation group, click Add Animation, and then click More Entrance Effects. In the Add Entrance Effect dialog box, under Moderate, click Grow & Turn, and then click OK. On the Animations tab, in the Timing group, in the Start list, select With Previous. On the Animations tab, in the Timing group, in the Duration box, enter 1. On the Animations tab, in the Advanced Animation group, click Add Animation, and then under Motion Paths click Arcs. On the Animations tab, in the Animation group, click Effect Options, and then click Right. On the Animations tab, in the Animation group, click Effect Options, and then click Reverse Path Direction. On the slide, select the arc effect path, and then drag the bottom sizing handle below the bottom of the slide. Drag the right side sizing handle to the left until the path curve approximately matches the curve of the modified triangle. Drag the green rotation handle to the left to rotate the arc path to match the curve of the modified triangle. Drag the arc path so that the red arrow is in the center of the picture. You may need to make further adjustments to the length, width, and angle of the arc path to match the curve of the modified triangle. On the slide, select the text box. On the Animations tab, in the Advanced Animation group, click Add Animation, and then under Entrance click Fade. On the Animations tab, in the Timing group, in the Start list, select After Previous. To reproduce the other animated pictures and text boxes on this slide, do the following: On the Animations tab, in the Advanced Animation group, click Animation Pane. On the slide, press and hold CTRL and then select the picture and the text box. On the Home tab, in the Clipboard group, click the arrow next to Copy, and then click Duplicate. On the slide, drag the duplicate picture and text onto the curve below the first group. On the slide, select the duplicate picture. Under Picture Tools, on the Format tab, in the Adjust group, click Change Picture. In the Insert Picture dialog box, select a picture, and then click Insert. Under Picture Tools, on the Format tab, in the Size group, click the Size and Position dialog box launcher. In the Format Picture dialog box, resize or crop the image so that the height is set to 1.2” and the width is set to 1.2”. To crop the picture, click Crop in the left pane, and in the right pane, under Crop position, enter values into the Height, Width, Left, and Top boxes. To resize the picture, click Size in the left pane, and in the right pane, under Size and rotate, enter values into the Height and Width boxes. In the Animation Pane, click the Arc animation effect for the new picture. Drag the green rotation handle to the right to rotate the arc path to match the curve of the modified triangle. Drag the arc path so that the red arrow is in the center of the picture. Click in the duplicate text box and edit the text. Repeat steps 2-7 two more times to reproduce the third and fourth pictures and text boxes with animation effects. 檢查角度與求職信 31
 To reproduce the curved shape on this slide, do the following: On the Home tab, in the Slides group, click Layout, and then click Blank. On the Home tab, in the Drawing group, click Shapes, and then under Basic Shapes click Right Triangle (first row, fourth option from the left). On the slide, draw a triangle. Under Drawing Tools, on the Format tab, in the Size group, enter 7.5 into the Height box and enter 4.75 into the Width box. On the Home tab, in the Drawing group, click Arrange, point to Align, and then do the following: Click Align Middle. Click Align Left. On the slide, select the triangle. Under Drawing Tools, on the Format tab, in the Insert Shapes group, click Edit Shape, and then click Edit Points. Right-click the diagonal side of the triangle, and then click Curved Segment. Click the bottom right corner of the triangle and then move the curve adjustment handle to create a consistent curve. Also on the Format tab, in the Shape Styles group, click Shape Fill, and then under Theme Colors click White, Background 1 (first row, first option from the left). Also on the Format tab, in the Shape Styles group, click Shape Outline, and then click No Outline. To reproduce the background effects on this slide, do the following: On the Design tab, in the Background group, click Background Styles, and then click Format Background. In the Format Background dialog box, click Fill in the left pane, select Gradient fill in the Fill pane, and then do the following: In the Type list, select Linear. In the Angle box, enter 225. Under Gradient stops, click Add gradient stops or Remove gradient stops until two stops appear in the slider. Also under Gradient stops, customize the gradient stops as follows: Select the first stop in the slider, and then do the following: In the Position box, enter 0%. Click the button next to Color, and then under Theme Colors click White, Background 1 (first row, first option from the left). In the Transparency box, enter 0%. In the Position box, enter 100%. Click the button next to Color, click More Colors, and then in the Colors dialog box, on the Custom tab, enter values for Red: 230, Green: 230, Blue: 230. To reproduce the picture and text effects on this slide, do the following: On the Insert tab, in the Images group, click Picture. In the Insert Picture dialog box, select a picture, and then click Insert. On the slide, select the picture. Under Picture Tools, on the Format tab, in the Size group, click the arrow under Crop, click Crop to Shape, and then under Basic Shapes click Oval (first option from the left). With the picture still selected, under Picture Tools, on the Format tab, in the Size group, click the Size and Position dialog box launcher. In the Format Picture dialog box, resize or crop the image so that the height is set to 1.2 and the width is set to To crop the picture, click Crop in the left pane, and in the right pane, under Crop position, enter values into the Height, Width, Left, and Top boxes. To resize the picture, click Size in the left pane, and in the right pane, under Size and rotate, enter values into the Height and Width boxes. Also in the Format Picture dialog box, click 3-D Format in the left pane, and then, in the 3-D Format pane, do the following: Under Bevel, click the button next to Top and click Circle (first row, first option from the left). Under Surface, click the button next to Material, and then under Standard click Metal (fourth option from the left). Click the button next to Lighting, and then under Neutral click Contrasting (second row, second option from the left). In the Angle box, enter 25°. Also in the Format Picture dialog box, click Shadow in the left pane. In the Shadow pane, click the button next to Presets, under Outer click Offset Diagonal Bottom Left (first row, third option from the left), and then do the following: In the Transparency box, enter 77%. In the Size box, enter 100%. In the Blur box, enter 10 pt. In the Angle box, enter 141°. In the Distance box, enter 10 pt. On the slide, drag the picture onto the curve, near the top. On the Insert tab, in the Text group, click Text Box. On the slide, drag to draw the text box. Enter text in the text box and select it. On the Home tab, in the Font group, do the following: In the Font list, select Corbel. In the Font Size box, enter 22. Click the arrow next to Font Color, and then under Theme Colors click White, Background 1, Darker 50% (sixth row, first option from the left). On the Home tab, in the Paragraph group, click Align Text Left to align the text left in the text box. On the slide, drag the text box to the right of the picture. To reproduce the animation effects on this slide, do the following: It will help to zoom out in order to view the area off the slide. On the View tab, in the Zoom group, click Zoom. In the Zoom dialog box, select 65%. On the Animations tab, in the Advanced Animation group, click Add Animation, and then click More Entrance Effects. In the Add Entrance Effect dialog box, under Moderate, click Grow & Turn, and then click OK. On the Animations tab, in the Timing group, in the Start list, select With Previous. On the Animations tab, in the Timing group, in the Duration box, enter 1. On the Animations tab, in the Advanced Animation group, click Add Animation, and then under Motion Paths click Arcs. On the Animations tab, in the Animation group, click Effect Options, and then click Right. On the Animations tab, in the Animation group, click Effect Options, and then click Reverse Path Direction. On the slide, select the arc effect path, and then drag the bottom sizing handle below the bottom of the slide. Drag the right side sizing handle to the left until the path curve approximately matches the curve of the modified triangle. Drag the green rotation handle to the left to rotate the arc path to match the curve of the modified triangle. Drag the arc path so that the red arrow is in the center of the picture. You may need to make further adjustments to the length, width, and angle of the arc path to match the curve of the modified triangle. On the slide, select the text box. On the Animations tab, in the Advanced Animation group, click Add Animation, and then under Entrance click Fade. On the Animations tab, in the Timing group, in the Start list, select After Previous. To reproduce the other animated pictures and text boxes on this slide, do the following: On the Animations tab, in the Advanced Animation group, click Animation Pane. On the slide, press and hold CTRL and then select the picture and the text box. On the Home tab, in the Clipboard group, click the arrow next to Copy, and then click Duplicate. On the slide, drag the duplicate picture and text onto the curve below the first group. On the slide, select the duplicate picture. Under Picture Tools, on the Format tab, in the Adjust group, click Change Picture. In the Insert Picture dialog box, select a picture, and then click Insert. Under Picture Tools, on the Format tab, in the Size group, click the Size and Position dialog box launcher. In the Format Picture dialog box, resize or crop the image so that the height is set to 1.2 and the width is set to To crop the picture, click Crop in the left pane, and in the right pane, under Crop position, enter values into the Height, Width, Left, and Top boxes. To resize the picture, click Size in the left pane, and in the right pane, under Size and rotate, enter values into the Height and Width boxes. In the Animation Pane, click the Arc animation effect for the new picture. Drag the green rotation handle to the right to rotate the arc path to match the curve of the modified triangle. Drag the arc path so that the red arrow is in the center of the picture. Click in the duplicate text box and edit the text. Repeat steps 2-7 two more times to reproduce the third and fourth pictures and text boxes with animation effects. 檢查角度與求職信. 31.")
32
25/02/2017 中文自傳 中文自傳不是「身家交代」、「自我介紹」,要把握精簡、扼要為原則,一般以600字為限。履歷自傳最多以兩頁為限,並且一定要把重點寫在第一頁(亮點全都露!)。 32 32
。 32 32")
33
為何要寫中文自傳? 未見其人,先賭其函,以書寫形式,傳達個人的學、經歷及專長,勾勒出應徵者的樣貌。
根據書寫的格式、排列美編、語辭字彙,判讀出應徵者的氣質內涵、文筆流暢與邏輯思考。 將履歷表上所有亮點做一整體性串連,更加立體化。 補強履歷上所未能完全陳述者: 『我收集了一些資料(有做功課),知道 貴醫療院所這項職缺需要輔以~~特殊技能,這項~~特殊技能正是我的強項(或說,我目前正在努力學習~~),我有自信可以勝任愉快。』 『我明白訓練新進人員會耗廢事業體與主管大量資源,一但我有幸進入貴醫療院所服務,一定不會輕言離職。』 33
,知道 貴醫療院所這項職缺需要輔以~~特殊技能,這項~~特殊技能正是我的強項(或說,我目前正在努力學習~~),我有自信可以勝任愉快。』 『我明白訓練新進人員會耗廢事業體與主管大量資源,一但我有幸進入貴醫療院所服務,一定不會輕言離職。』 33.")
34
傳統自傳格式 (展現:硬性能力)描述自己有哪些優勢,內容必須與職位有關,例如:畢業科系、輔修科系、相關報告、論文、研究計畫、專題製作、論文內容、證照、獲獎紀錄等,並簡述學習成果。簡單來說,就是將自己能秀出來的具體成績。 第一段 (展現:軟性能力)描述無法實體展現的軟性能力。例如,求職者的個性、人格特質、處事態度、人際關係、領導能力與學習經驗等。這些內容往往沒有具體證件或文件可以證明,所以必須透過其他人的評語或具體事例說明來描述。 第二段 (展現:未來潛力)延續前一段的內容,並將這些特質延伸做為職場上可運用的工具。例如:前一段介紹自己有良好的人際關係,將如何運用在工作上;穩健細心的人格特質,對職涯發展而言,有絕對的必要性。在最後將這些條件與應徵職缺做連結,凸顯自己未來在職務發展潛力。 第三段 34
描述無法實體展現的軟性能力。例如,求職者的個性、人格特質、處事態度、人際關係、領導能力與學習經驗等。這些內容往往沒有具體證件或文件可以證明,所以必須透過其他人的評語或具體事例說明來描述。 第二段. (展現:未來潛力)延續前一段的內容,並將這些特質延伸做為職場上可運用的工具。例如:前一段介紹自己有良好的人際關係,將如何運用在工作上;穩健細心的人格特質,對職涯發展而言,有絕對的必要性。在最後將這些條件與應徵職缺做連結,凸顯自己未來在職務發展潛力。 第三段. 34.")
35
護理人員的履歷&自傳 個人基本資料 家庭狀況、學歷、専長 工作經驗 工作過的醫療機構 特長(特殊單位,如:加護病房,急診等特殊單位)
優良事蹟 個人心得 對工作的期許、展望抱負 發表過的作品 専案 研究 個案報告 其他専長(加分用) 語言--英文.日文等 藝術--音樂.繪畫 文書處理--電腦文書處理 35
 語言--英文.日文等. 藝術--音樂.繪畫. 文書處理--電腦文書處理. 35.")
36
自傳範例說明 範例-白雅婷 36

37
簡要自傳:量化與條列式 本人畢業於○○大學, ,主修電腦工程,副修市場學。從1995年學校畢業後,已 經累計有將近5年的電腦程式設計經驗,同時期也有將近3年的市場行銷業務及 專案管理的實際操作經驗: 美商○○資訊(股)公司,系統分析師及SQL工程師 - 3年經驗 主要職責:1. 客戶端自動處理資料的可行性和成本分析 2. 評估新產品系統的架構與規劃工程人力 主要成績:1. 成功將系統導入ABC機台,3個月內降低故障比率5% 2. QOO公司全面資料庫架構更新,資料遺失狀況大幅減少 ○○電腦股份有限公司,工程部經理兼任行銷部副理 - 5年經驗 主要職責:管理近40人工程人員, 控管專案進度流程與年度KPI目標一致 主要成績:公司業績因為產品不良率減低,每季業績持續成長近15% 本人不論在工程技術上或是行銷市場拓展上,都有一定的專業經驗,半年前也開 始利用週末時間,在○○大學企管所進修班學習,希望能更加強個人在管理層 次上的提昇。 37
公司,系統分析師及SQL工程師 - 3年經驗. 主要職責:1. 客戶端自動處理資料的可行性和成本分析. 2. 評估新產品系統的架構與規劃工程人力. 主要成績:1. 成功將系統導入ABC機台,3個月內降低故障比率5% 2. QOO公司全面資料庫架構更新,資料遺失狀況大幅減少 ○○電腦股份有限公司,工程部經理兼任行銷部副理 - 5年經驗. 主要職責:管理近40人工程人員, 控管專案進度流程與年度KPI目標一致. 主要成績:公司業績因為產品不良率減低,每季業績持續成長近15% 本人不論在工程技術上或是行銷市場拓展上,都有一定的專業經驗,半年前也開 始利用週末時間,在○○大學企管所進修班學習,希望能更加強個人在管理層 次上的提昇。 37.")
38
履歷種類與格式:電子履歷、一般履歷與自備中英文履歷
前言:履歷表之定位 履歷種類與格式:電子履歷、一般履歷與自備中英文履歷 中文自傳 Animated picture buttons grow and turn on path (Advanced) To reproduce the curved shape on this slide, do the following: On the Home tab, in the Slides group, click Layout, and then click Blank. On the Home tab, in the Drawing group, click Shapes, and then under Basic Shapes click Right Triangle (first row, fourth option from the left). On the slide, draw a triangle. Under Drawing Tools, on the Format tab, in the Size group, enter 7.5” into the Height box and enter 4.75” into the Width box. On the Home tab, in the Drawing group, click Arrange, point to Align, and then do the following: Click Align Middle. Click Align Left. On the slide, select the triangle. Under Drawing Tools, on the Format tab, in the Insert Shapes group, click Edit Shape, and then click Edit Points. Right-click the diagonal side of the triangle, and then click Curved Segment. Click the bottom right corner of the triangle and then move the curve adjustment handle to create a consistent curve. Also on the Format tab, in the Shape Styles group, click Shape Fill, and then under Theme Colors click White, Background 1 (first row, first option from the left). Also on the Format tab, in the Shape Styles group, click Shape Outline, and then click No Outline. To reproduce the background effects on this slide, do the following: On the Design tab, in the Background group, click Background Styles, and then click Format Background. In the Format Background dialog box, click Fill in the left pane, select Gradient fill in the Fill pane, and then do the following: In the Type list, select Linear. In the Angle box, enter 225. Under Gradient stops, click Add gradient stops or Remove gradient stops until two stops appear in the slider. Also under Gradient stops, customize the gradient stops as follows: Select the first stop in the slider, and then do the following: In the Position box, enter 0%. Click the button next to Color, and then under Theme Colors click White, Background 1 (first row, first option from the left). In the Transparency box, enter 0%. In the Position box, enter 100%. Click the button next to Color, click More Colors, and then in the Colors dialog box, on the Custom tab, enter values for Red: 230, Green: 230, Blue: 230. To reproduce the picture and text effects on this slide, do the following: On the Insert tab, in the Images group, click Picture. In the Insert Picture dialog box, select a picture, and then click Insert. On the slide, select the picture. Under Picture Tools, on the Format tab, in the Size group, click the arrow under Crop, click Crop to Shape, and then under Basic Shapes click Oval (first option from the left). With the picture still selected, under Picture Tools, on the Format tab, in the Size group, click the Size and Position dialog box launcher. In the Format Picture dialog box, resize or crop the image so that the height is set to 1.2” and the width is set to 1.2”. To crop the picture, click Crop in the left pane, and in the right pane, under Crop position, enter values into the Height, Width, Left, and Top boxes. To resize the picture, click Size in the left pane, and in the right pane, under Size and rotate, enter values into the Height and Width boxes. Also in the Format Picture dialog box, click 3-D Format in the left pane, and then, in the 3-D Format pane, do the following: Under Bevel, click the button next to Top and click Circle (first row, first option from the left). Under Surface, click the button next to Material, and then under Standard click Metal (fourth option from the left). Click the button next to Lighting, and then under Neutral click Contrasting (second row, second option from the left). In the Angle box, enter 25°. Also in the Format Picture dialog box, click Shadow in the left pane. In the Shadow pane, click the button next to Presets, under Outer click Offset Diagonal Bottom Left (first row, third option from the left), and then do the following: In the Transparency box, enter 77%. In the Size box, enter 100%. In the Blur box, enter 10 pt. In the Angle box, enter 141°. In the Distance box, enter 10 pt. On the slide, drag the picture onto the curve, near the top. On the Insert tab, in the Text group, click Text Box. On the slide, drag to draw the text box. Enter text in the text box and select it. On the Home tab, in the Font group, do the following: In the Font list, select Corbel. In the Font Size box, enter 22. Click the arrow next to Font Color, and then under Theme Colors click White, Background 1, Darker 50% (sixth row, first option from the left). On the Home tab, in the Paragraph group, click Align Text Left to align the text left in the text box. On the slide, drag the text box to the right of the picture. To reproduce the animation effects on this slide, do the following: It will help to zoom out in order to view the area off the slide. On the View tab, in the Zoom group, click Zoom. In the Zoom dialog box, select 65%. On the Animations tab, in the Advanced Animation group, click Add Animation, and then click More Entrance Effects. In the Add Entrance Effect dialog box, under Moderate, click Grow & Turn, and then click OK. On the Animations tab, in the Timing group, in the Start list, select With Previous. On the Animations tab, in the Timing group, in the Duration box, enter 1. On the Animations tab, in the Advanced Animation group, click Add Animation, and then under Motion Paths click Arcs. On the Animations tab, in the Animation group, click Effect Options, and then click Right. On the Animations tab, in the Animation group, click Effect Options, and then click Reverse Path Direction. On the slide, select the arc effect path, and then drag the bottom sizing handle below the bottom of the slide. Drag the right side sizing handle to the left until the path curve approximately matches the curve of the modified triangle. Drag the green rotation handle to the left to rotate the arc path to match the curve of the modified triangle. Drag the arc path so that the red arrow is in the center of the picture. You may need to make further adjustments to the length, width, and angle of the arc path to match the curve of the modified triangle. On the slide, select the text box. On the Animations tab, in the Advanced Animation group, click Add Animation, and then under Entrance click Fade. On the Animations tab, in the Timing group, in the Start list, select After Previous. To reproduce the other animated pictures and text boxes on this slide, do the following: On the Animations tab, in the Advanced Animation group, click Animation Pane. On the slide, press and hold CTRL and then select the picture and the text box. On the Home tab, in the Clipboard group, click the arrow next to Copy, and then click Duplicate. On the slide, drag the duplicate picture and text onto the curve below the first group. On the slide, select the duplicate picture. Under Picture Tools, on the Format tab, in the Adjust group, click Change Picture. In the Insert Picture dialog box, select a picture, and then click Insert. Under Picture Tools, on the Format tab, in the Size group, click the Size and Position dialog box launcher. In the Format Picture dialog box, resize or crop the image so that the height is set to 1.2” and the width is set to 1.2”. To crop the picture, click Crop in the left pane, and in the right pane, under Crop position, enter values into the Height, Width, Left, and Top boxes. To resize the picture, click Size in the left pane, and in the right pane, under Size and rotate, enter values into the Height and Width boxes. In the Animation Pane, click the Arc animation effect for the new picture. Drag the green rotation handle to the right to rotate the arc path to match the curve of the modified triangle. Drag the arc path so that the red arrow is in the center of the picture. Click in the duplicate text box and edit the text. Repeat steps 2-7 two more times to reproduce the third and fourth pictures and text boxes with animation effects. 檢查角度與求職信
 To reproduce the curved shape on this slide, do the following: On the Home tab, in the Slides group, click Layout, and then click Blank. On the Home tab, in the Drawing group, click Shapes, and then under Basic Shapes click Right Triangle (first row, fourth option from the left). On the slide, draw a triangle. Under Drawing Tools, on the Format tab, in the Size group, enter 7.5 into the Height box and enter 4.75 into the Width box. On the Home tab, in the Drawing group, click Arrange, point to Align, and then do the following: Click Align Middle. Click Align Left. On the slide, select the triangle. Under Drawing Tools, on the Format tab, in the Insert Shapes group, click Edit Shape, and then click Edit Points. Right-click the diagonal side of the triangle, and then click Curved Segment. Click the bottom right corner of the triangle and then move the curve adjustment handle to create a consistent curve. Also on the Format tab, in the Shape Styles group, click Shape Fill, and then under Theme Colors click White, Background 1 (first row, first option from the left). Also on the Format tab, in the Shape Styles group, click Shape Outline, and then click No Outline. To reproduce the background effects on this slide, do the following: On the Design tab, in the Background group, click Background Styles, and then click Format Background. In the Format Background dialog box, click Fill in the left pane, select Gradient fill in the Fill pane, and then do the following: In the Type list, select Linear. In the Angle box, enter 225. Under Gradient stops, click Add gradient stops or Remove gradient stops until two stops appear in the slider. Also under Gradient stops, customize the gradient stops as follows: Select the first stop in the slider, and then do the following: In the Position box, enter 0%. Click the button next to Color, and then under Theme Colors click White, Background 1 (first row, first option from the left). In the Transparency box, enter 0%. In the Position box, enter 100%. Click the button next to Color, click More Colors, and then in the Colors dialog box, on the Custom tab, enter values for Red: 230, Green: 230, Blue: 230. To reproduce the picture and text effects on this slide, do the following: On the Insert tab, in the Images group, click Picture. In the Insert Picture dialog box, select a picture, and then click Insert. On the slide, select the picture. Under Picture Tools, on the Format tab, in the Size group, click the arrow under Crop, click Crop to Shape, and then under Basic Shapes click Oval (first option from the left). With the picture still selected, under Picture Tools, on the Format tab, in the Size group, click the Size and Position dialog box launcher. In the Format Picture dialog box, resize or crop the image so that the height is set to 1.2 and the width is set to To crop the picture, click Crop in the left pane, and in the right pane, under Crop position, enter values into the Height, Width, Left, and Top boxes. To resize the picture, click Size in the left pane, and in the right pane, under Size and rotate, enter values into the Height and Width boxes. Also in the Format Picture dialog box, click 3-D Format in the left pane, and then, in the 3-D Format pane, do the following: Under Bevel, click the button next to Top and click Circle (first row, first option from the left). Under Surface, click the button next to Material, and then under Standard click Metal (fourth option from the left). Click the button next to Lighting, and then under Neutral click Contrasting (second row, second option from the left). In the Angle box, enter 25°. Also in the Format Picture dialog box, click Shadow in the left pane. In the Shadow pane, click the button next to Presets, under Outer click Offset Diagonal Bottom Left (first row, third option from the left), and then do the following: In the Transparency box, enter 77%. In the Size box, enter 100%. In the Blur box, enter 10 pt. In the Angle box, enter 141°. In the Distance box, enter 10 pt. On the slide, drag the picture onto the curve, near the top. On the Insert tab, in the Text group, click Text Box. On the slide, drag to draw the text box. Enter text in the text box and select it. On the Home tab, in the Font group, do the following: In the Font list, select Corbel. In the Font Size box, enter 22. Click the arrow next to Font Color, and then under Theme Colors click White, Background 1, Darker 50% (sixth row, first option from the left). On the Home tab, in the Paragraph group, click Align Text Left to align the text left in the text box. On the slide, drag the text box to the right of the picture. To reproduce the animation effects on this slide, do the following: It will help to zoom out in order to view the area off the slide. On the View tab, in the Zoom group, click Zoom. In the Zoom dialog box, select 65%. On the Animations tab, in the Advanced Animation group, click Add Animation, and then click More Entrance Effects. In the Add Entrance Effect dialog box, under Moderate, click Grow & Turn, and then click OK. On the Animations tab, in the Timing group, in the Start list, select With Previous. On the Animations tab, in the Timing group, in the Duration box, enter 1. On the Animations tab, in the Advanced Animation group, click Add Animation, and then under Motion Paths click Arcs. On the Animations tab, in the Animation group, click Effect Options, and then click Right. On the Animations tab, in the Animation group, click Effect Options, and then click Reverse Path Direction. On the slide, select the arc effect path, and then drag the bottom sizing handle below the bottom of the slide. Drag the right side sizing handle to the left until the path curve approximately matches the curve of the modified triangle. Drag the green rotation handle to the left to rotate the arc path to match the curve of the modified triangle. Drag the arc path so that the red arrow is in the center of the picture. You may need to make further adjustments to the length, width, and angle of the arc path to match the curve of the modified triangle. On the slide, select the text box. On the Animations tab, in the Advanced Animation group, click Add Animation, and then under Entrance click Fade. On the Animations tab, in the Timing group, in the Start list, select After Previous. To reproduce the other animated pictures and text boxes on this slide, do the following: On the Animations tab, in the Advanced Animation group, click Animation Pane. On the slide, press and hold CTRL and then select the picture and the text box. On the Home tab, in the Clipboard group, click the arrow next to Copy, and then click Duplicate. On the slide, drag the duplicate picture and text onto the curve below the first group. On the slide, select the duplicate picture. Under Picture Tools, on the Format tab, in the Adjust group, click Change Picture. In the Insert Picture dialog box, select a picture, and then click Insert. Under Picture Tools, on the Format tab, in the Size group, click the Size and Position dialog box launcher. In the Format Picture dialog box, resize or crop the image so that the height is set to 1.2 and the width is set to To crop the picture, click Crop in the left pane, and in the right pane, under Crop position, enter values into the Height, Width, Left, and Top boxes. To resize the picture, click Size in the left pane, and in the right pane, under Size and rotate, enter values into the Height and Width boxes. In the Animation Pane, click the Arc animation effect for the new picture. Drag the green rotation handle to the right to rotate the arc path to match the curve of the modified triangle. Drag the arc path so that the red arrow is in the center of the picture. Click in the duplicate text box and edit the text. Repeat steps 2-7 two more times to reproduce the third and fourth pictures and text boxes with animation effects. 檢查角度與求職信.")
39
25/02/2017 檢查角度 『知彼知己、百戰百勝』與『擇己所善、投其所好』是履歷表撰寫及面試的最高指導原則。 39 39

40
履歷表 = 品牌企畫書 履歷表是向雇主呈現未來潛力和特殊價值的媒介
由應徵職務的工作性質中找出適合自己的重點字詞,然後「差異化」,把特點極大化、焦點深耕,展現強項。 1 履歷表內清楚指出自己在過去工作(實習、社團)中的貢獻和價值。 2 採用條列式方法來呈現自己的履歷,讓履歷表在二分鐘內為主考官清楚說明一切。 3 深入說明擔任的職務內容與貢獻,甚至進一步利用圖表,條理說明在每一個職務的實際表現。 4 40
中的貢獻和價值。 2. 採用條列式方法來呈現自己的履歷,讓履歷表在二分鐘內為主考官清楚說明一切。 3. 深入說明擔任的職務內容與貢獻,甚至進一步利用圖表,條理說明在每一個職務的實際表現。")
41
範例說明:應徵職務 41

42
客製化履歷表 = 研究報告書 如果您已經有履歷表,就該針對應徵的工作所列之特定需求與條件,重新著墨:
在提筆前,應先下功夫「研究雇主」,目標明確地全力爭取一個準雇主。 1 配合對方所開出之條件,修改並闡述您的工作經驗與專業背景如何符合這個工作之要求。 2 要把面談當成去報告此份「研究報告書」,具體說出以前運用專業技能完成之實例、提供之解決方案,如:由X Y。 3 如果肯先花點時間研究一下,那麼找工作時,拿的就是「熱追蹤導彈」,而不是「散彈槍」。 4 42

43
Be Your Personal (CV)Best
Present the CV with the best possible looks. Must have some essential Contents. Agree on best format. Writing in a way that keeps the reader awake. 43

44
求職信 Cover Letter (自我推薦信函)
一個CV在投遞以前,還要準備一份Cover Letter 放在 的內文中,給面試官,說明應徵理由並引起興趣,形式上像一頁A4的提案書。

45
自我推薦信函 Dear Sirs, 敬呈 ○○ 執事:
Your advertisement of the job opening for ○○(Job Application) posted on the 104.com has strongly interested me. With ○ years experiences in ○○ field plus ○ years practices in ○○ area, I have full confidence in handling any new challenges that this position may be confronted with. The attached CV both in English and Chinese contain additional details about my qualifications. And, I will be much appreciated if an opportunity of job interview will be arranged at your earliest convenience. Sincerely yours, 敬呈 ○○ 執事: 頃閱 貴公司於○月○日於104.com ○○職位之求才 資訊,茲此函送個人履歷附上自傳前來應徵,期 望能有機會獲得面談之安排。 第二段: 針對職位特性強調自己的核心才能及學經歷,引 導對方注意您要強調的優勢。 充分表現您對應試之應徵產業理解度(在履歷表 裡無法呈現這部份)。 描述打工經歷與補充說明。 謝謝您撥冗審閱,如有面談之安排請隨時以手機: ________ 或 __________ 和我聯絡。 謹頌 時祺! 後學 ○○○ 敬上
 posted on the 104.com has strongly interested me. With ○ years experiences in ○○ field plus ○ years practices in ○○ area, I have full confidence in handling any new challenges that this position may be confronted with. The attached CV both in English and Chinese contain additional details about my qualifications. And, I will be much appreciated if an opportunity of job interview will be arranged at your earliest convenience. Sincerely yours, 敬呈 ○○ 執事: 頃閱 貴公司於○月○日於104.com ○○職位之求才 資訊,茲此函送個人履歷附上自傳前來應徵,期 望能有機會獲得面談之安排。 第二段: 針對職位特性強調自己的核心才能及學經歷,引 導對方注意您要強調的優勢。 充分表現您對應試之應徵產業理解度(在履歷表 裡無法呈現這部份)。 描述打工經歷與補充說明。 謝謝您撥冗審閱,如有面談之安排請隨時以手機: ________ 或 __________ 和我聯絡。 謹頌 時祺! 後學 ○○○ 敬上.")
46
Contact Details Linda Wang
王藝玲 寶來證券股份有限公司 ext 3518 46

47
審核履歷注意事項(一) 1.學歷、工作年份中斷或不詳。 2.遊牧民族。 3.中途輟學、肆業者。 4.提前退伍或免役。
5.待遇、職位高於所應徵職位。 6.內容不詳或未填者。 7.薪資待遇突飛猛進或起伏頗大。

48
審核履歷注意事項(二) 8.離職原因。 9.辭職再找工作者。 10.產業、職務或職位差異太大。 11.職位(稱)怪異。
12.待遇偏低或升遷緩慢。 13.職務內容交代不詳。

49
感謝信 面試後第二天一早寄出 Dear Manager Wang:
It was very enjoyable to speak with you about the ○○○ position at your company. The job, as you presented it, seems to be a very good match for my skills and interests. Attached is a very interesting article to share with you and kindly visit my blog, whenever possible. I am very interested in working for you and look forward to hearing from you about this position. Sincerely, 王經理您好, 昨日就貴公司○○○職缺與您相談甚為愉快,而您所敘述之工作內容,的確與我的興趣與專長十分吻合。 隨文附上一篇有趣的文章與您分享,也歡迎您有空時造訪我的部落格 。 希望能夠有機會到貴公司服務,與您共事。 後學 ○○○ 敬上

50
Sorry letter不Sorry 接到未錄取通知書的因應方案(一) 行動 寫信或寫卡片給用人主管及人事主管
感謝他們為安排你的面試及相關程序所盡的心力 希望他們能不吝對你的履歷表或是面試的失敗提出指教 進一步向他們再度表明加入該公司的強烈意願 說明 大多數求職者在收到sorry letter之後的反應不聞不問 讓用人主管對你印象深刻,認為你對此次的面試非常在乎,又願意虛心求教 容易再次考慮或為你暗中留意其他合適的機會

51
Sorry letter不Sorry 接到未錄取通知書的因應方案(二) 行動 自行準備相關的醫療健康管理報告或是企畫案給用人單位的主管
再度表現自己的企圖心及決心 希望對方日後有職缺時能再通知你 說明 因為面試最後一關的決勝關鍵,有時很難有定論,也許你和對手的實力不相上下 被錄用的新人在3個月的試用期未滿前就離開新職的例子也時有聽聞 收到sorry letter之後,如何積極回應將是再造巔峰的關鍵

52
電話 Reference Check 詢問候選人的過去的職位、職責、工作年 資、參與過的專案、特殊表現。
詢問候選人的工作態度、溝通能力(善與 人處)、個性、出勤狀況。 詢問候選人的能力上強、弱項? 跟貴公司類似職務的同事比較,該候選人 的表現如何? 如果本公司在_____職務上聘僱他/她,我們 會有任何需要特別考量之處嗎? 他/她為什麼離職?(委婉地問、仔細地 聽)。 如果有機會,您會再雇用他/她嗎?(委婉 地問、仔細地聽)。
、個性、出勤狀況。 詢問候選人的能力上強、弱項? 跟貴公司類似職務的同事比較,該候選人 的表現如何? 如果本公司在_____職務上聘僱他/她,我們 會有任何需要特別考量之處嗎? 他/她為什麼離職?(委婉地問、仔細地 聽)。 如果有機會,您會再雇用他/她嗎?(委婉 地問、仔細地聽)。")
Similar presentations
Gifmake (2)PICASION.COM By Shark. Gifmake introduction(1) 1.You can create a picture. Just specify width and height in pixels, then you'll.>")


.>")


 Exercises(练习)>")


